Manage approvals and permissions
Agents in Visual Studio Code can edit files, run terminal commands, and call external tools. VS Code uses two security layers to help you control these actions:
- Approvals determine whether an action runs automatically or requires your confirmation.
- Sandboxing restricts the file system and network resources that agent terminal commands can access, even after the commands are approved.
This article explains how these layers work together and how to configure permission levels, tool and URL approvals, terminal auto-approval, and sandboxing. For the security concepts behind these controls, see Trust and safety.
| Mechanism | What it controls | Key setting |
|---|---|---|
| Permission levels | The approval behavior for a chat session | chat.permissions.default |
| Tool approval | Which tools require confirmation before or after they run | chat.tools.eligibleForAutoApproval |
| URL approval | Which URLs can be requested and which responses can enter the chat context | chat.tools.urls.autoApprove |
| Terminal approval | Which terminal commands run without confirmation | chat.tools.terminal.autoApprove |
| Sandboxing | The file system and network boundaries for terminal commands | Platform-specific |
Permission levels
Permission levels control how the agent handles approvals for the current chat session. Select a level from the permissions dropdown in the chat input. You can change it at any time.
New sessions use the level configured by chat.permissions.default .
Assisted permissions is available only for supported sessions that run on the Agent Host. For the Copilot harness, choose Folder isolation because worktree sessions always use Allow all.
Enable the chat.assistedPermissions.enabled setting to show Assisted permissions in supported Agent Host permission pickers. An organization can also hide this option by disabling global auto-approval.
| Permission level | Description |
|---|---|
| Manual permissions (default) | Uses your tool, URL, and terminal approval settings. Actions that are not auto-approved require your confirmation. |
| Assisted permissions | Uses an LLM judge to assess each tool call. Calls that the judge does not approve require your confirmation. |
| Allow all | Runs all tool calls without confirmation. |
Sandboxing is independent of the permission level. Allow all and Autopilot skip approval prompts, but an enabled sandbox still restricts terminal file system and network access. Because sandboxing applies only to terminal commands, use tool and URL approvals to control other actions with Manual permissions.
Assisted permissions reduces approval interruptions but does not replace your judgment. The model-based risk assessment can make mistakes. The first time you select this level, a warning dialog asks you to confirm.
Allow all and Autopilot skip confirmation for potentially destructive actions, including file edits, terminal commands, and external tool calls. The first time you select either option, a warning dialog asks you to confirm. Use these options only when you trust the workspace and understand the security implications.
How Autopilot works
Autopilot is an agent mode, not a permission level. Select it from the mode picker in the chat input to let the agent work autonomously until it determines that the task is complete. Autopilot:
- Auto-approves all tools, like Allow all.
- Retries when it encounters errors.
- Responds automatically to questions that would otherwise block progress.
For differences between Autopilot on the Agent Host and extension host, see Agent Host behavior.
Advanced autopilot (Preview)
Advanced Autopilot delegates the completion decision to a separate model. After each turn, a small, fast model evaluates whether the original request is complete and guides the next turn when more work is needed. Set
chat.autopilot.advanced.enabled
to true to use this preview feature.
Autopilot consumes AI credits like interactive chat. Learn more about usage-based billing.
Allow all tools globally
To auto-approve tools across all workspaces, enable
chat.tools.global.autoApprove
. To bypass approvals only for the current supported local or Copilot CLI session, use /yolo or /autoApprove. Use /disableYolo or /disableAutoApprove to restore the session's default permission level.
Prefer the session-scoped Allow all level when you do not need auto-approval in every workspace.
Global auto-approval removes confirmation prompts in every workspace. Only enable it if you understand the security implications. The first time you enable it, a warning dialog asks you to confirm.
Tool approval
Some tools can modify your environment or access external services. Their results can also contain prompt injection attempts. Tool approval protects against both risks.
When approval is required, review the tool name and input parameters, then approve a single use or grant approval for the session, workspace, or all future invocations.
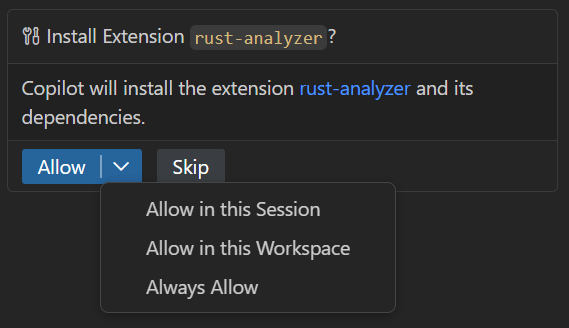
For files that contain secrets or sensitive configuration, require explicit approval for edits to sensitive files.
Always review tool parameters carefully before approving, especially for tools that modify files, run commands, or access external services. See the Security considerations for using AI in VS Code.
Manage tool approvals
Run Chat: Manage Tool Approval from the Command Palette (⇧⌘P (Windows, Linux Ctrl+Shift+P)) to review and configure approvals. Tools are grouped by source, such as an MCP server or extension.
| Approval | Effect |
|---|---|
| Pre-approval ("without approval") | Runs the tool without a confirmation dialog. |
| Post-approval ("without reviewing result") | Adds the tool result to the chat context without review. Use caution with external data that might contain prompt injection. |
Expand a source to configure approvals for individual tools, or select the top-level checkboxes to trust all tools from a specific MCP server or extension at once.
Prevent tools from being auto-approved
Set a tool to false in
chat.tools.eligibleForAutoApproval
to always require manual approval. The confirmation dialog then does not offer an auto-approval option for that tool.
Organizations can also use device management policies to enforce manual approvals for specific tools. Learn more in the Enterprise documentation.
Reset tool confirmations
Run Chat: Reset Tool Confirmations from the Command Palette (⇧⌘P (Windows, Linux Ctrl+Shift+P)) to clear all saved approvals. To change individual approvals, use Chat: Manage Tool Approval.
URL approval
When a tool accesses a URL, such as the #web/fetch tool, VS Code separates approval into two decisions:
| Step | What you approve | Protection |
|---|---|---|
| Request approval | Contacting the URL or domain | Prevents data from being sent to an untrusted site. |
| Response approval | Adding the fetched content to the chat context | Helps prevent prompt injection from untrusted content. |
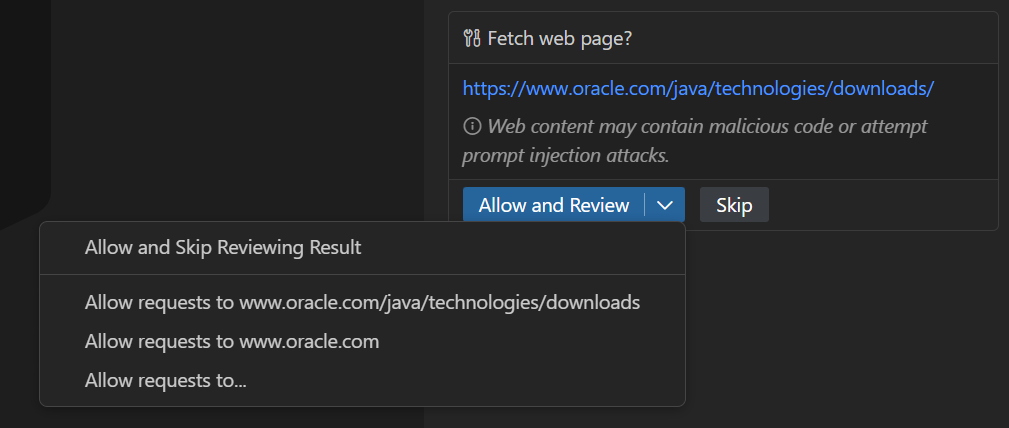
For each step, you can approve once or automatically approve future requests or responses for the URL or domain. Approving a request does not approve its response.
Request approval uses the Trusted Domains list. A trusted domain does not require request approval, but its response still requires review unless you separately auto-approve responses for that domain.
Use
chat.tools.urls.autoApprove
to store exact URLs, glob patterns, or wildcards. Set a pattern to a boolean to control both steps, or use approveRequest and approveResponse to control them separately.
URL auto-approval examples:
{
  "chat.tools.urls.autoApprove": {
    "https://www.example.com": false,
    "https://*.contoso.com/*": true,
    "https://example.com/api/*": {
      "approveRequest": true,
      "approveResponse": false
    }
  }
}
Automatically approve terminal commands
The agent uses one tool to run any terminal command. To avoid granting that tool unrestricted approval, VS Code evaluates each command separately.
By default, common read-only commands run automatically, while risky commands such as rm and del require approval. Add rules to
chat.tools.terminal.autoApprove
to change this behavior:
- Set a command to
trueto auto-approve it. - Set a command to
falseto require approval. - Wrap a regular expression in
/characters to match a command pattern.
For example:
{
  // Allow the `mkdir` command
  "mkdir": true,
  // Allow `git status` and commands starting with `git show`
  "/^git (status|show\\b.*)$/": true,

  // Always require approval for the `del` command
  "del": false,
  // Always require approval for commands containing "dangerous"
  "/dangerous/": false
}
A false rule requires approval. It does not block the command. To block a terminal tool call in the Local harness, use a Preview PreToolUse hook that returns permissionDecision: "deny".
By default, rules match each subcommand. A compound command is auto-approved only when all its subcommands match a true rule and none match a false rule. A false rule always takes precedence.
To evaluate the full command line instead, use object syntax and set matchCommandLine to true.
Related settings:
- Disable chat.tools.terminal.enableAutoApprove to require approval for every command.
-
chat.tools.terminal.blockDetectedFileWrites
Block detected terminal file writes is experimental and might change or be removed.
defaults to
outsideWorkspace, which requires approval for detected writes outside the workspace. The OS temporary folder (/tmpon macOS and Linux,%TEMP%on Windows) is exempt when session-level command approval is active. - Enable the experimental chat.tools.terminal.ignoreDefaultAutoApproveRules setting to ignore the built-in rules and use only your rules. Built-in deny rules are designed to protect against dangerous commands.
Terminal auto-approval is a best-effort convenience, not a security boundary. Command detection has these limitations:
- The PowerShell and bash tree-sitter grammars might not identify every subcommand.
- zsh and fish commands are parsed with the bash grammar, which can miss syntax differences.
- File write detection is limited, and obfuscated commands can evade matching.
If prompt injection is a concern or you work in a high-risk environment, sandbox agent commands or run VS Code in a container.
Sandbox agent commands
Agent sandboxing is in Preview on macOS, Linux, and WSL2, and Experimental on Windows.
Agent sandboxing restricts file system and network access for terminal commands. It is independent of the selected permission level, so an enabled sandbox continues to restrict terminal commands with Allow all and Autopilot.
Select Sandboxing for terminal in the permissions picker to turn sandboxing on or off. For Copilot Agent Host sessions, the toggle applies only to the current session. New sessions use the effective User or Workspace setting for their platform, and an explicit session selection persists when you restore the session. Managed settings can require sandboxing and disable the toggle.
Restart VS Code after you change chat.agent.networkFilter , chat.agent.allowedNetworkDomains , or chat.agent.deniedNetworkDomains to ensure new integrated browser sessions use the updated network policy.
Learn how to configure agent terminal sandboxing, including platform prerequisites, file system and network restrictions, session behavior, and fallback controls.