Create and manage agent automations
Automations run agent tasks from a saved prompt, session configuration, and schedule. Use them for work such as summarizing repository changes or triaging issues without starting each session manually. Run an automation on demand or on a recurring schedule. You can also start from a template or share an automation as a reusable file.
This article explains how to create, share, run, schedule, and manage automations.
Prerequisites
- Set up and open the Agents window with an available agent.
- Enable chat.automations.enabled in the Settings editor.
Automations are rolling out gradually. The setting is off by default on Stable and on by default in Insiders. If Automations isn't visible in the sidebar, check that the setting is enabled.
Create an automation
-
In the Agents window sidebar, select Automations.
-
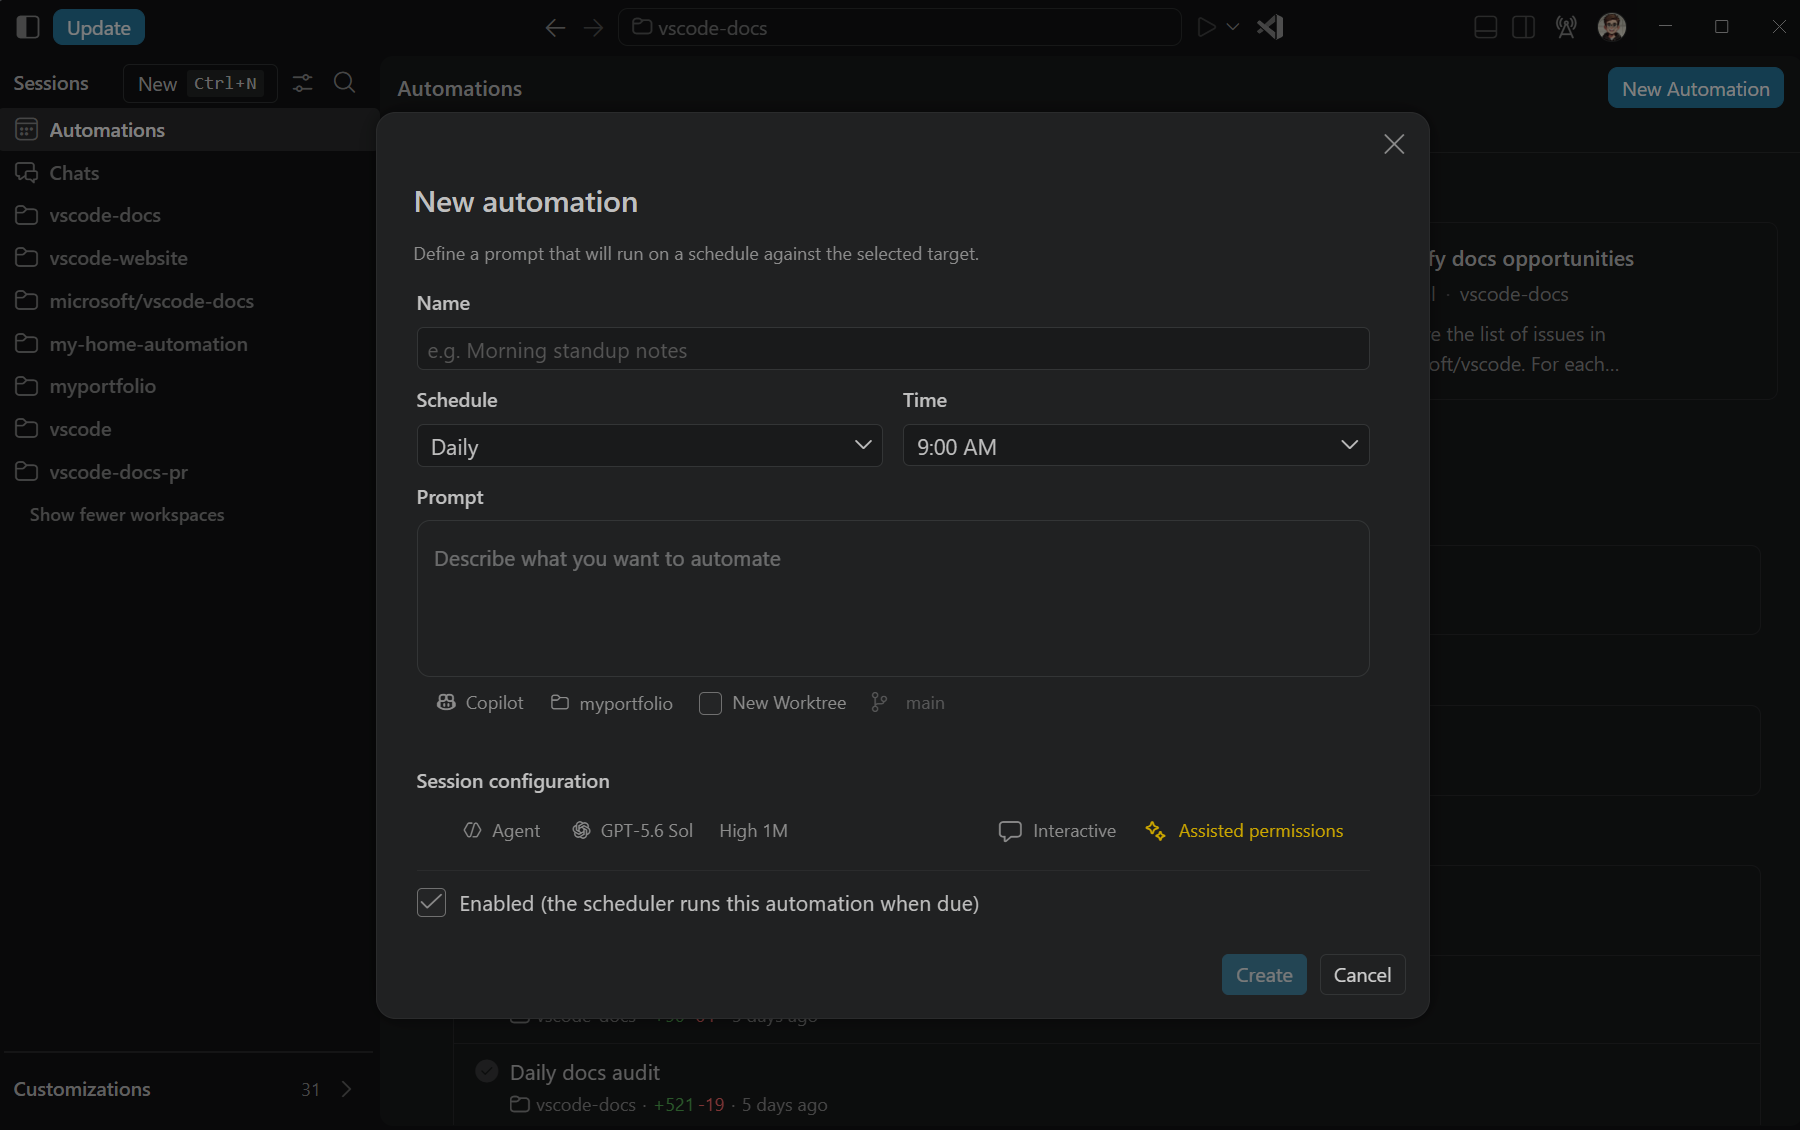
Select Create Automation, or start from a template to fill in a starting prompt and schedule.
-
Enter a descriptive Name and a Prompt. Specify the task, its scope, and the output you expect. For example:
Summarize commits on the current branch from the last 24 hours.
Group the summary by feature, fix, and maintenance work.
Include commit references and flag changes that might need documentation.
Do not modify files.
If you start with a template, review and adapt its prompt before saving.
-
Choose the workspace where the agent should work, or No workspace for a task that doesn't need project files. The available agents depend on this choice.
-
Choose an available agent and review Session configuration, including the model and permission options. For a Git workspace, you can select New Worktree and a base branch when the agent supports isolation. Learn how to choose an agent and code isolation.
-
Set Schedule to Manual to check the task before making it recurring, and then select Create.
An automation can read files, run commands, and make changes according to its agent's permissions. Review the permission level before scheduling unattended work. Saving an automation doesn't bypass organization policies or guarantee that future runs won't need your approval.
Start from a template
Automation templates provide a starting name, prompt, and schedule that you can review and adapt:
- Built-in Templates contains templates included with VS Code.
- Templates from Plugins contains templates from enabled Agent Plugins. Each template shows a Plugin badge and its source plugin.
The template sections start expanded when you have no saved automations and collapsed when you have saved automations. A blue marker on Templates from Plugins indicates that an enabled plugin contributed a new template. Expand the section to clear the marker.
Select a template to open it in the New Automation dialog. Review the prompt and schedule, and then choose the workspace, agent, model, permissions, and isolation. The Enabled checkbox is cleared by default. Select it only after you review the complete configuration, and then select Create.
Disabling a plugin removes its templates from the view. Automations that you already created from those templates and their run history remain available.
Run and review an automation
Select Run now on the automation card. The automation starts an agent session, and its run appears under History.
Select a run in History to open its session. Review the response and any changes before relying on the task's output. If the session needs approval, review the request there. If a run fails, inspect its error and session before trying again.
Each run uses the selected agent and model, so account for recurring usage when choosing a schedule.
Set a recurring schedule
After checking the first run, select the automation's name to edit it. Choose a Schedule, keep Enabled selected, and select Save.
| Schedule | When it runs |
|---|---|
| Manual | Only when you select Run now. |
| Hourly | Every hour. |
| Daily | At the selected Time each day. |
| Weekly | At the selected Time on the selected Day of week. |
Daily and weekly schedules use your local time zone.
Keep these execution requirements in mind:
- Keep the machine that runs the automation awake and its agent available. Agent Host-backed schedules require a running Agent Host process. Other schedules require a running VS Code window. Don't assume that local automations continue after you quit the application.
- After an interruption, a missed schedule can trigger a catch-up run. Don't rely on every missed occurrence being replayed.
- An automation runs one session at a time. Another scheduled occurrence doesn't start a parallel run of the same automation.
Share an automation
Export an automation as a .automation.md file to reuse it on another machine or share it with someone else. The file is readable Markdown with YAML frontmatter and contains only portable information:
- Name and prompt.
- Manual, hourly, daily, or weekly schedule.
- File format version and portable identifier.
The file doesn't include the workspace, provider, model, permissions, enabled state, or run history. The person who imports the file chooses these options locally.
Export an automation
-
On the automation card, select More Actions > Export.
-
Choose where to save the proposed
.automation.mdfile.
You can open the exported file in an editor to review its prompt and schedule before you share it.
Import an automation
-
Select Import Automation in the Automations view, and then choose a
.automation.mdfile. You can also drag one.automation.mdfile anywhere over the view. -
In the New Automation dialog, review the imported name, prompt, and schedule.
-
Choose the workspace, agent, model, permissions, and isolation for the automation.
-
The Enabled checkbox is cleared by default. Select it only after you review the complete configuration, and then select Create.
VS Code rejects unsupported files instead of silently changing their schedule or importing execution permissions.
Manage an automation
- Edit: select the automation's name, update its prompt, target, session configuration, or schedule, and select Save.
- Enable or disable future runs: select More Actions > Enable or Disable. Disabling an automation doesn't stop a run already in progress.
- Duplicate: select More Actions > Duplicate, review the copy in the New Automation dialog, and select Create.
- Stop an active run: select Stop for the running session in History.
- Export: select More Actions > Export. For more information, see Share an automation.
- Delete: select More Actions > Delete and confirm. This permanently deletes the automation and its run history.