Build prompt agents with Agent Builder in Foundry Toolkit
Prompt agents in Microsoft Foundry combine a model, instructions, and tools to carry out a task. Instructions guide the agent's behavior, and tools connect it to information and actions outside the model. Use this approach when instructions and supported tools meet your needs without a custom agent runtime.
Agent Builder in Foundry Toolkit for Visual Studio Code lets you develop that configuration in a visual editor. You can test conversations, refine instructions and tools, and save useful changes as versions. This guide takes you from creating a prompt agent to reviewing its behavior, setting up evaluation, and generating client code for application integration.
This guide starts with prompt agents saved in Microsoft Foundry. Agent Builder also supports locally stored prompts, which have different tool, evaluation, and storage options. To choose a code-based approach instead, see Create agents with the Foundry Toolkit.
Prerequisites
For the Foundry prompt-agent path, you need:
- Visual Studio Code and the Foundry Toolkit extension.
- Access to a Microsoft Foundry project and permission to create agents and use its models and tools.
- A model deployment in that project. See Set up Microsoft Foundry resources.
Select your Foundry project in the Toolkit before you start. For extension and project setup, see the Foundry Toolkit overview. Local prompt development does not require a Foundry project unless you use Foundry resources.
Create a prompt agent
-
In the Foundry Toolkit view, select Developer Tools > Build > Create Agent.
-
Select Build an agent to open Agent Builder.
-
In Basic Information, enter an Agent name. Start and end the name with a letter or number. You can use hyphens between them.
-
Select a Foundry-hosted model from Model. Use Browse models if you need to add a model.
-
In Instructions, describe the task, required behavior, and expected response.
For example:
Summarize a software issue for the engineering team. Identify the reported problem, steps to reproduce, and expected behavior. Ask for missing information instead of inventing details. -
Select Save to Foundry.
-
On the Playground tab, enter a request and select Send message. Ask a follow-up question to test the conversation.
If Developer Tools uses Group by Resource, Create Agent is under Agent Dev Tools instead of Build. You can also open My Resources > Agents, select the Prompt Agent tab, and select Add Prompt Agent. Select an existing agent in that list to edit it.
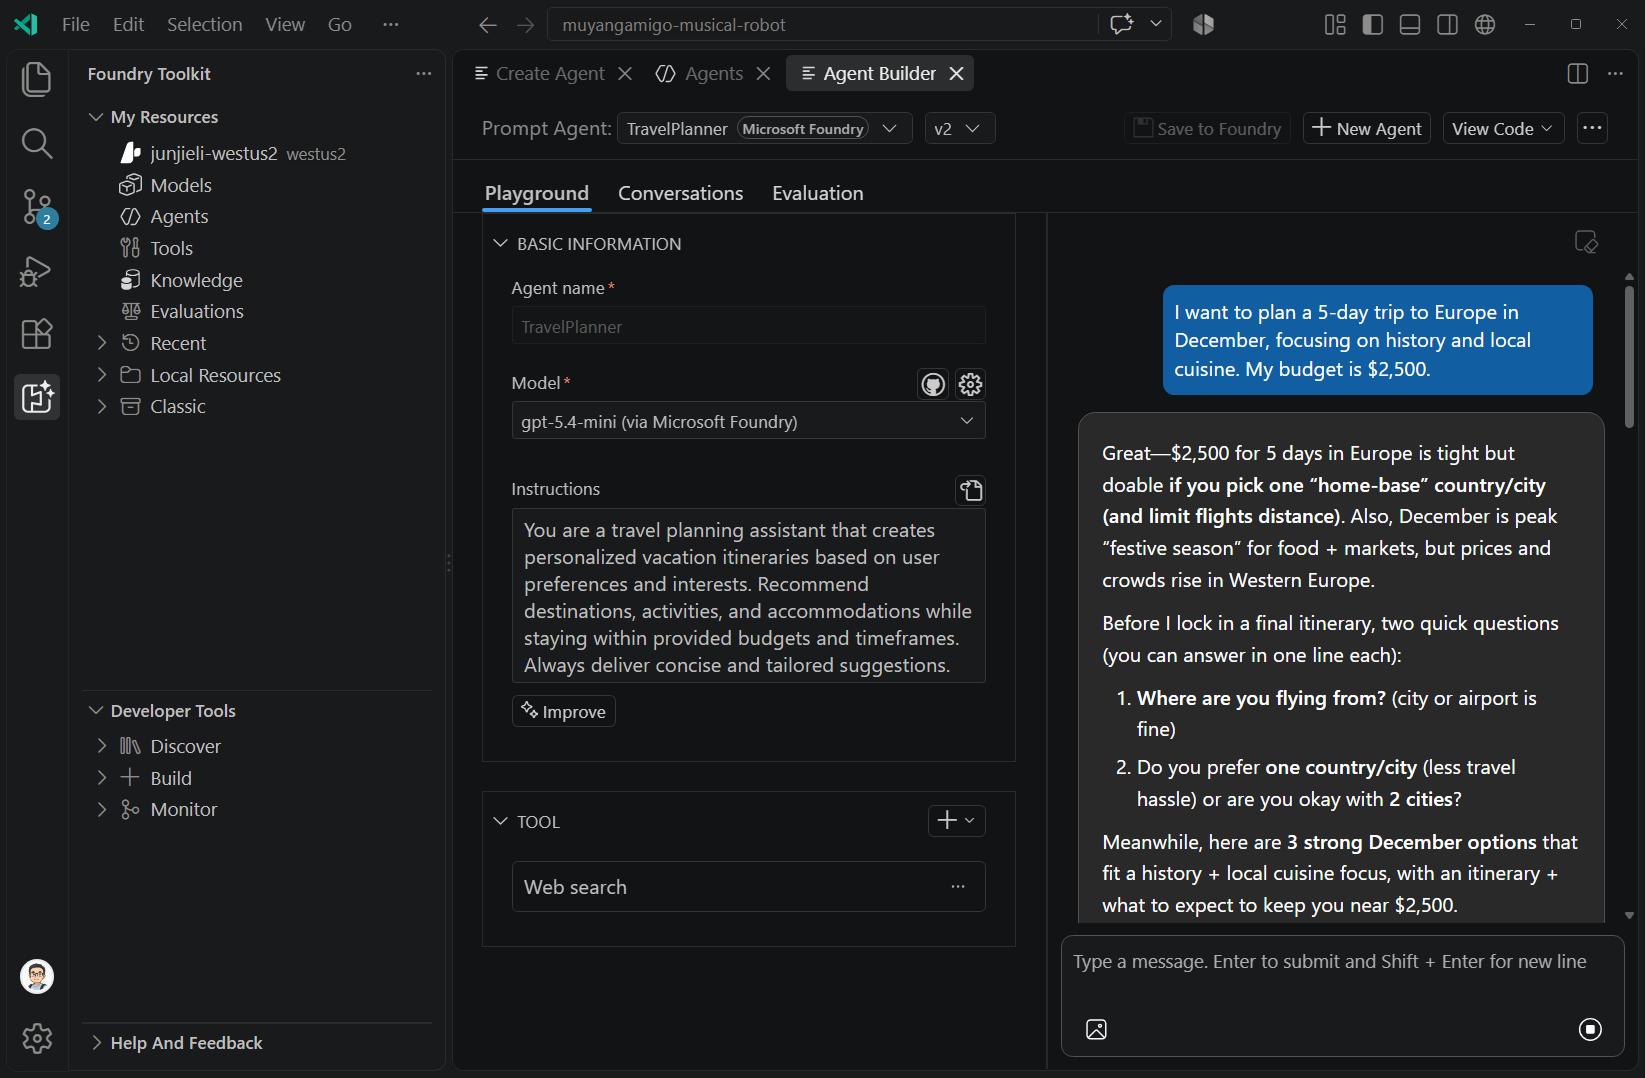
Choose where to save
The available save actions depend on the selected model and tools:
| Configuration | Save destination |
|---|---|
| Foundry-hosted model without local tools. | Save to Foundry. When available, the save menu also offers Save to Local. |
| Foundry-hosted model with Foundry tools. | Save to Foundry. |
| A model from another provider, or an agent with local tools. | Save to Local. |
The Microsoft Foundry and Local badges identify where the agent is stored. A locally stored prompt can still call a cloud model. Local storage does not mean that inference runs on your machine.
Save drafts and versions
Agent Builder preserves work in three different ways:
| Action | Result |
|---|---|
| Edit instructions, model settings, or tools. | Agent Builder stores a local recovery draft. This does not create a Foundry version. |
| Run a new, unsaved agent. | Agent Builder validates its name and model and saves it before the first run. It prefers Foundry when the model and tools support that destination. |
| Select Save to Foundry after changing an existing Foundry agent. | Agent Builder saves the changes as a new version in the project. |
When Agent Builder finds a recovery draft, it offers Restore Draft or Discard. Save important changes explicitly before switching agents or versions.
You can test unsaved changes to an existing Foundry agent in the playground. That run uses the edited configuration rather than a saved agent-version reference. Save the configuration before you rely on version-linked conversation history, tracing, evaluation, or generated client code.
Save to Foundry saves an agent version. It does not publish an agent application with a stable application endpoint. For that separate operation, see Agent applications in Microsoft Foundry.
Select an agent version
Use the version selector next to the agent name to load a saved version. Saved Foundry versions are immutable. To keep edits made from an earlier version, select Save to Foundry to create a new version.
The selected version also determines the conversation history shown in Agent Builder and the version referenced by generated client code.
Add tools to a Foundry agent
Tools let an agent retrieve information or perform actions. For example, you can attach a configured Model Context Protocol (MCP) connection, file search, or code interpreter. Tool availability depends on the model and the resources in your project.
Use Tool Catalog to register shared connections and configure their endpoints and authentication. In Agent Builder, attach the tools needed by this agent:
- Open a saved Foundry agent on the Playground tab.
- In Tool, select + > Add tools.
- In Select a tool, choose a connection from Configured, or use Catalog to find a tool.
- Complete any required configuration, then select Add Tool.
- Select Save to Foundry and send a request that requires the tool.
Review tool inputs and results in the response. If the agent requests approval, select Approve or Deny for that call.
Configure tool approvals
For an MCP tool, open the tool's options and select Configure. Choose whether to require approval for every call, automatically approve all tools, or automatically approve specific tools. Review the selection before saving the agent.
These settings control approval prompts. They do not grant access to the underlying service. For service permissions, see Agent identity concepts in Microsoft Foundry.
Use a toolbox
A toolbox groups reusable tools behind one managed MCP endpoint. It can also contain skills and provide tool search, which are preview features.
Toolbox integration in prompt agents is off by default. In VS Code settings, turn on windowsaistudio.enableToolboxInPromptAgent to show the attachment controls.
Before you attach a toolbox, note these effects:
- A prompt agent uses either a toolbox or a set of individual Foundry tools. Attaching a toolbox replaces the individual tools already attached to the agent.
- With a toolbox attached, Add tools adds tools inside that toolbox. These edits are staged until you save the agent, when they create a new toolbox version.
- Toolboxes are shared resources. Review changes to the toolbox and the agent before you save.
To attach an existing toolbox:
- Open a saved Foundry agent.
- In Tool, select + > Browse toolboxes.
- Select the toolbox and review its version, tools, and skills.
- Select Add.
- Expand the toolbox card to inspect its contents and review approval settings.
- Select Save to Foundry.
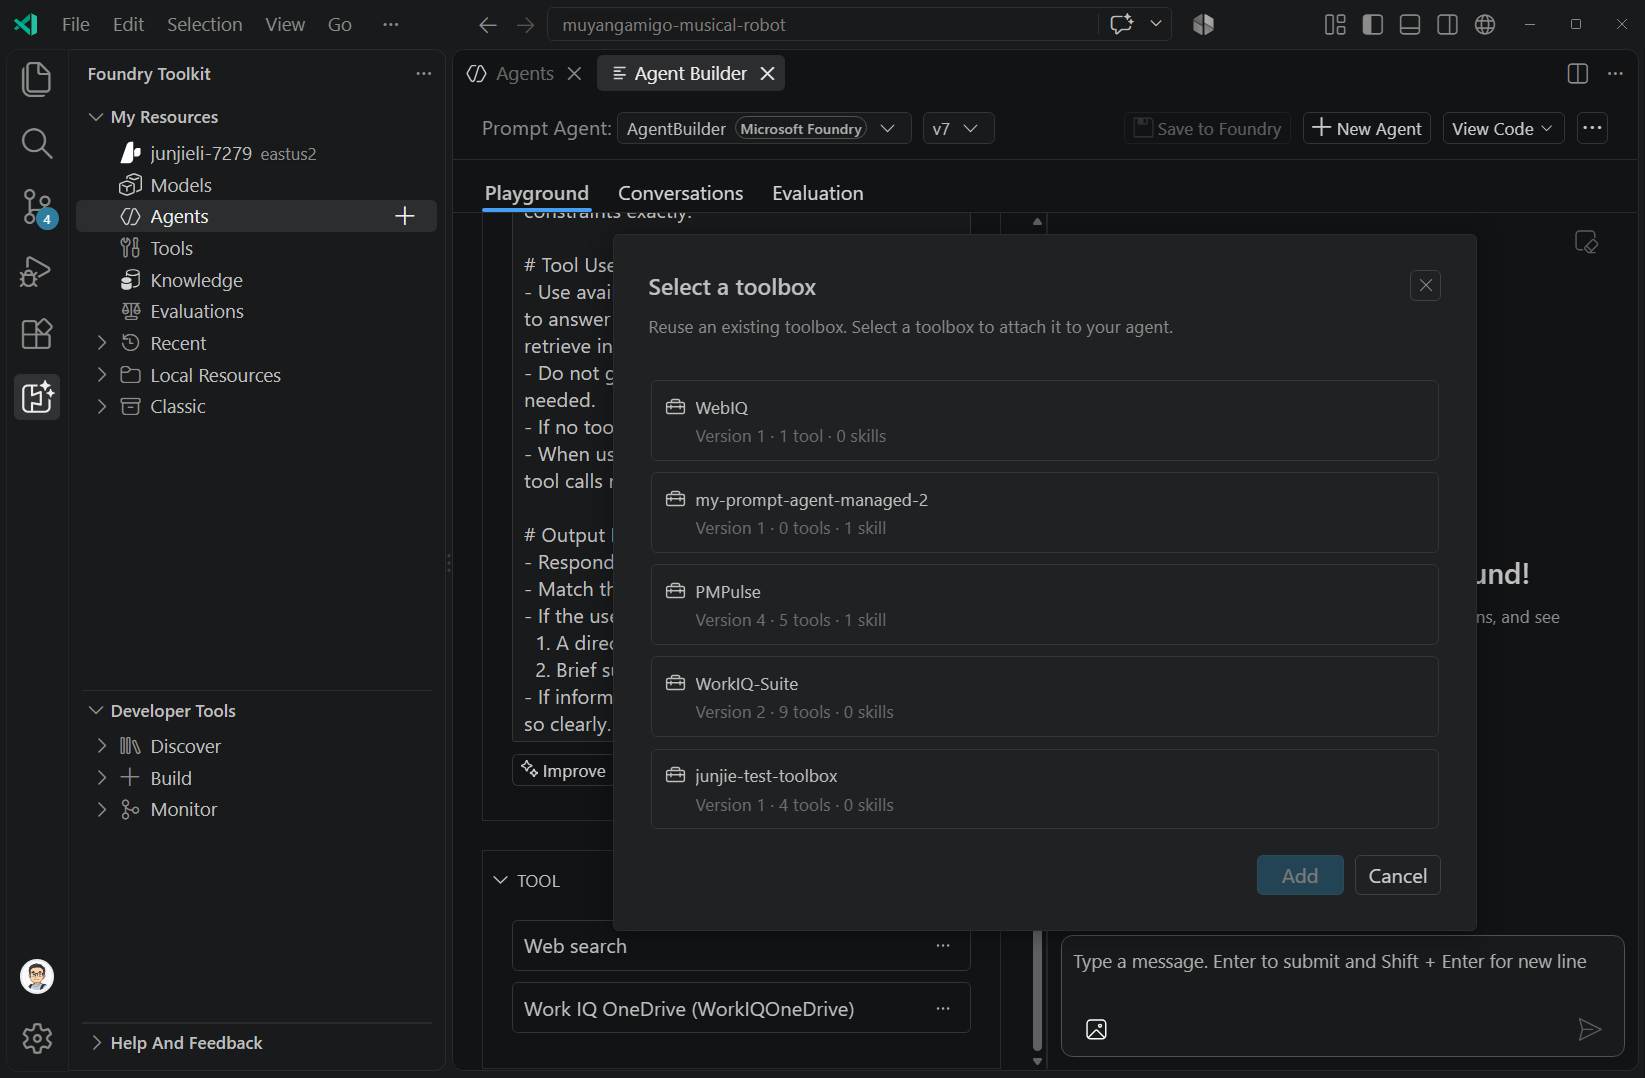
You can also use Add to Prompt Agent from the Toolbox resource list. To create a toolbox or configure its shared connections, use the Tool Catalog guide.
Manage an attached toolbox
Use the toolbox card's More options menu:
| Action | Effect |
|---|---|
| Configure | Change tool-call approval settings for this agent. |
| Switch version | Select another version of the attached toolbox. |
| Replace | Choose a different toolbox. |
| Remove | Detach the toolbox from this agent. |
| Opt out | Keep the tools as individual agent tools. Toolbox skills, tool search, and reuse as a versioned set are no longer available to the agent. |
Expand the card to inspect tools and skills. For tools that support configuration, use the nested tool's Configure action. Save the agent after changing its toolbox configuration.
Connect another agent with A2A (Preview)
Agent-to-Agent (A2A) connections let a prompt agent invoke an A2A-compatible agent as a tool. This is different from asking Copilot to generate agent code.
-
Open a saved Foundry agent.
-
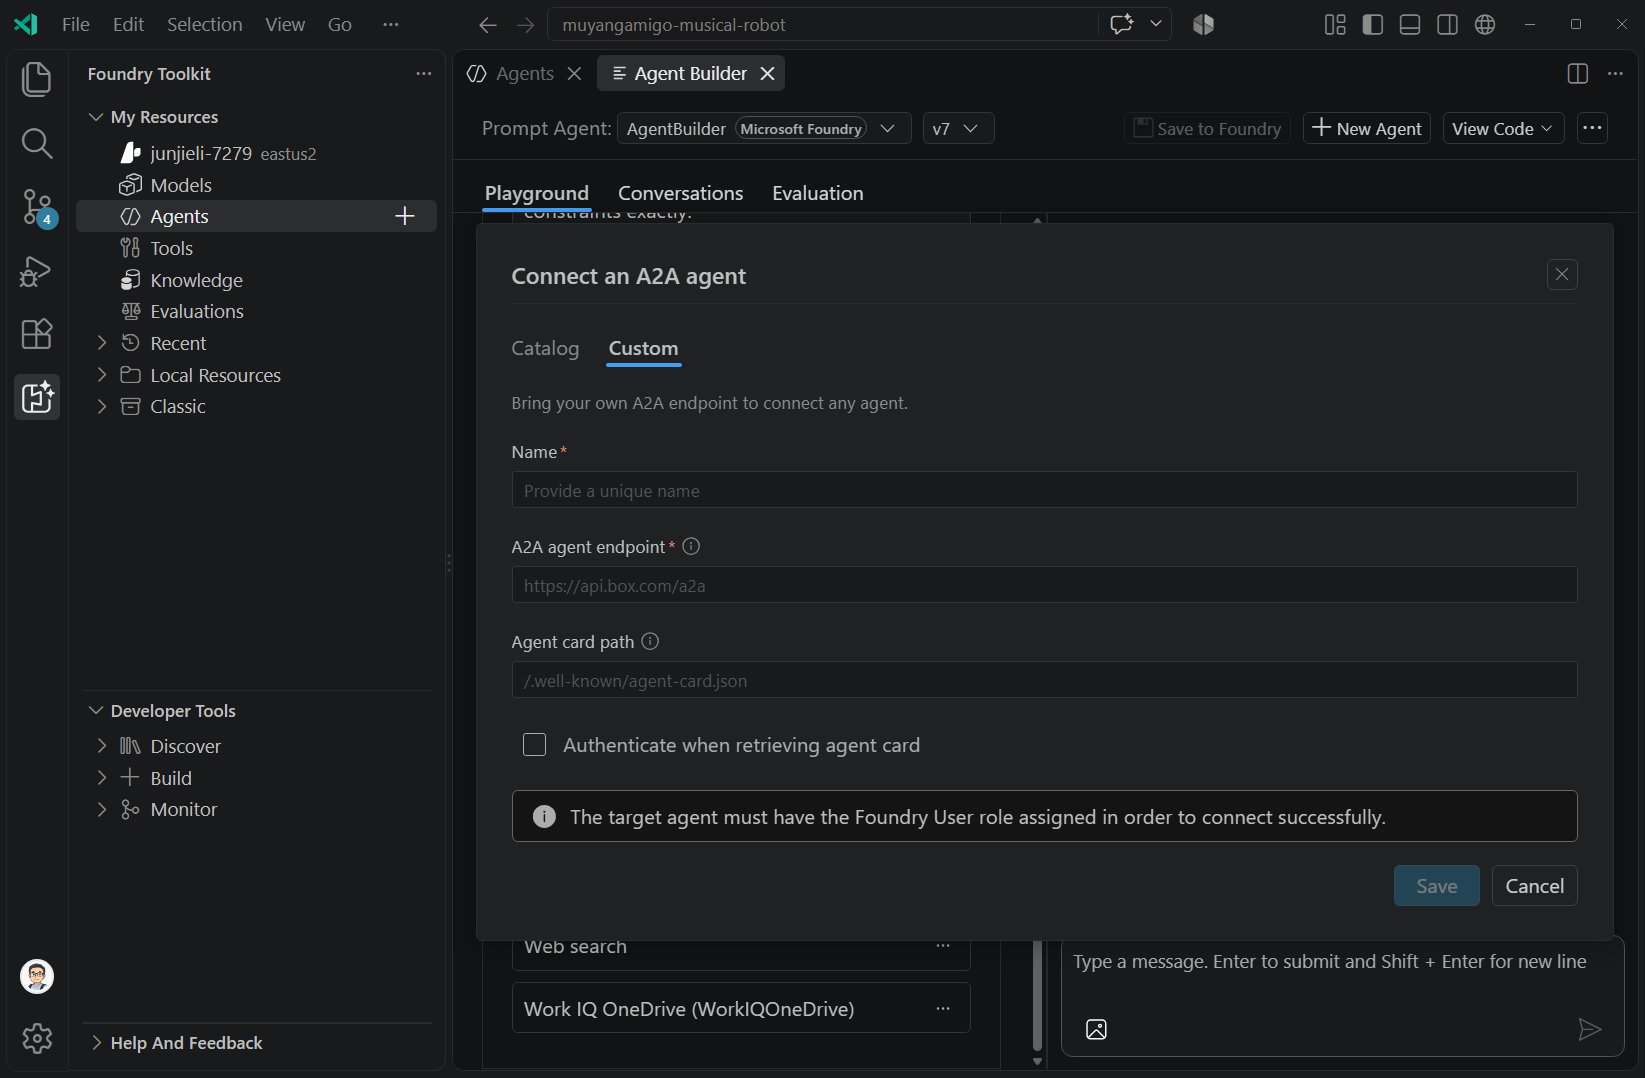
In Tool, select + > Add agent (A2A).
-
In Connect an A2A agent, choose the path that matches your target:
Tab What to provide Configured Select an existing A2A connection. This tab is available when configured connections exist. Catalog Select an agent from the Foundry account catalog. Continue through the agent-card and authentication steps when prompted. Custom Enter a name, a valid HTTPS A2A endpoint, and its agent-card path. Select Authenticate when retrieving agent card if required by the endpoint. -
Complete the dialog to connect or add the agent.
-
Select Save to Foundry, then test a request that requires the connected agent.
For a catalog agent that does not yet expose A2A, the dialog asks you to define an agent card. The card describes the agent and the capabilities it exposes. The authentication step lets you choose an agent identity or user identity passthrough. For endpoint setup and permissions, see Enable an A2A endpoint.
You can attach an A2A connection directly to the prompt agent or add it through an attached toolbox. The direct A2A path does not require the toolbox opt-in setting.
Review conversations and switch agents
The Playground contains the current test conversation. Use Clear all messages to start a fresh conversation.
For a saved Foundry agent, select Conversations to review history for the selected agent version. The list includes the conversation status, token usage, and start time. Select a conversation to open its messages and response details. Opening history does not resume that conversation in the playground.
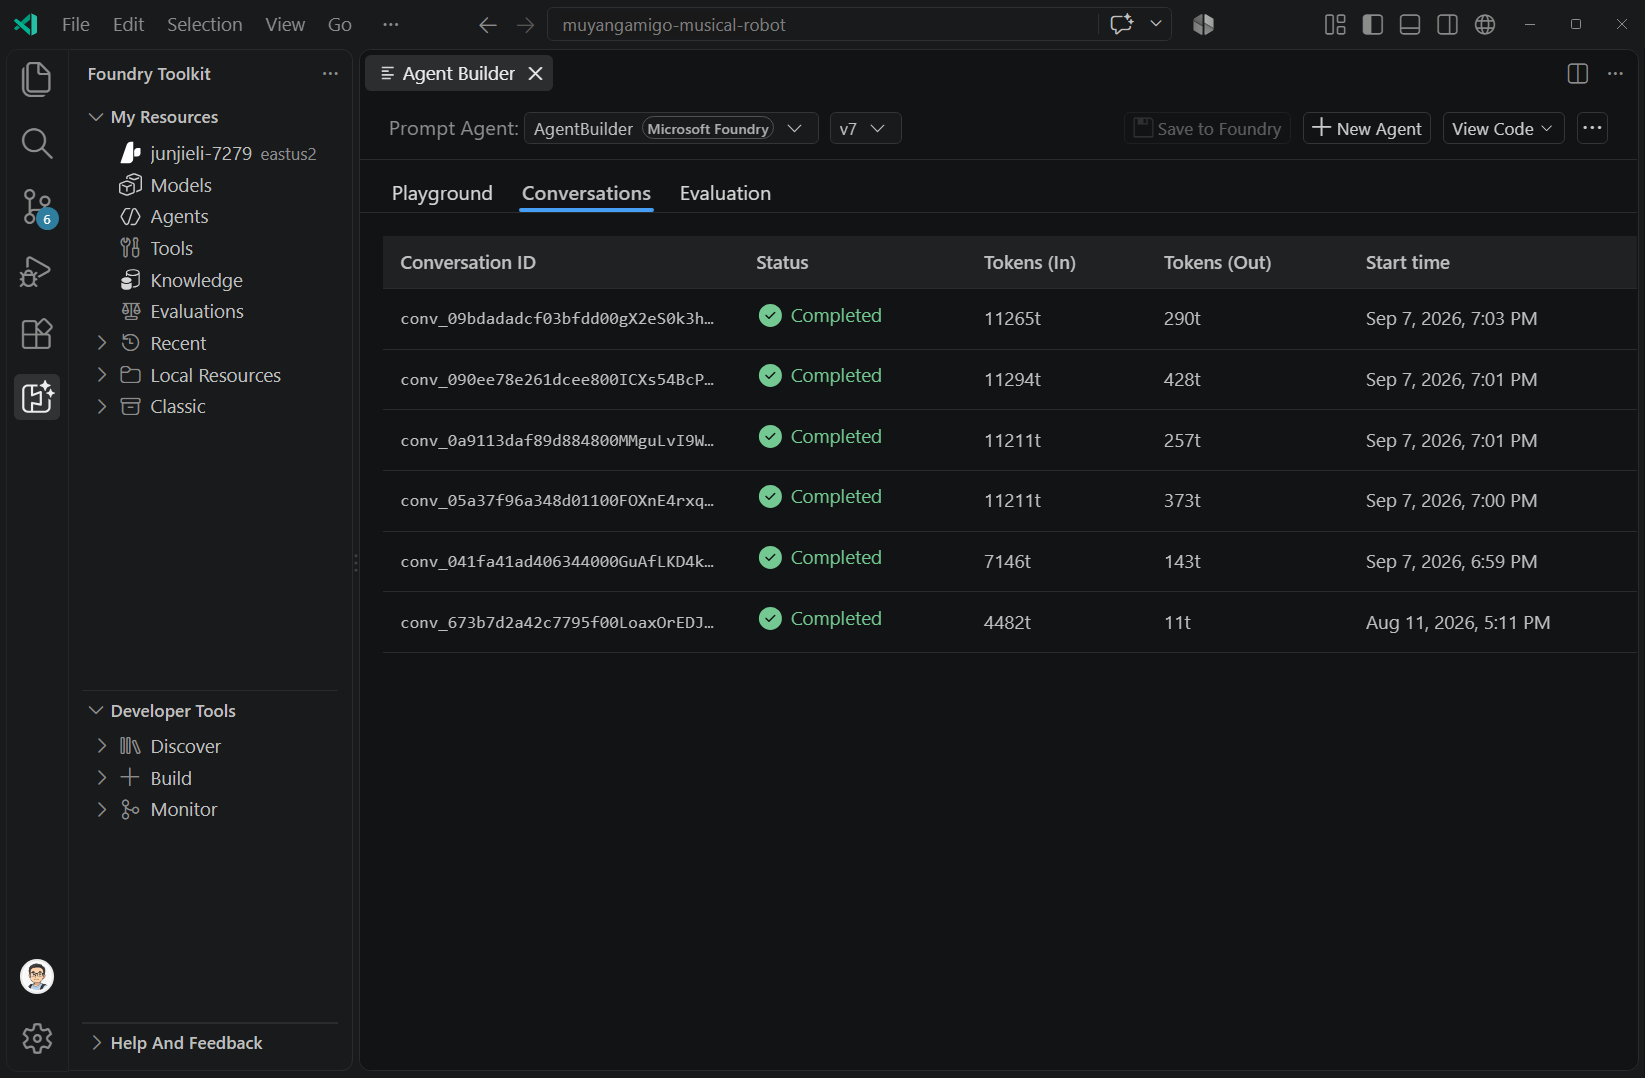
Use the agent selector at the top of Agent Builder to switch between local agents and Foundry prompt agents. Check the storage badge and version after switching. The Conversations tab is available for saved Foundry agents, not local prompts.
Generate and improve instructions
Use Generate to draft instructions from a task description, or Improve to revise existing instructions. If you need a starting idea, select a model and use Inspire me while the Instructions field is empty.
- Select a model that supports instruction generation.
- Under Instructions, select Generate if the field is empty, or Improve if it already contains instructions.
- Describe the task or the change you want. For an existing Foundry agent, improvement suggestions are optional.
- Select Generate or Improve in the dialog.
- Review the revised instructions and test the agent with representative requests.
- Select Save to Foundry to keep the new configuration.
For Foundry agents, these actions use Foundry Prompt Optimizer. If its optimization API does not support the selected model, the Toolkit falls back to standard prompt generation when supported. This instruction-editing flow is separate from a hosted-agent optimization job.
Evaluate a Foundry prompt agent
Save the agent version that you want to evaluate, then select Evaluation.
- Select Scaffold Evaluation Code to generate a local Python evaluation project. Follow its generated instructions to configure and run the evaluation.
- Select the Foundry link for guided evaluation setup.
The Foundry agent's Evaluation tab is not the local prompt dataset grid. For service-side evaluation concepts and procedures, see Evaluate your AI agents.
Generate client code
After you save a Foundry agent, use the View Code menu to integrate it into an application:
| Action | Output |
|---|---|
| View Code | A Python project that calls the existing Foundry prompt agent. Choose a folder, then follow the generated README.md for dependencies, configuration, and authentication. |
| View Snippets | A Python code snippet in an editor that calls the existing Foundry prompt agent. |
Both outputs reference the selected saved version. Save your edits before generating code if you want the application to use the revised configuration.
Generating client code does not convert the prompt agent into a hosted agent. To create and call a prompt agent directly with a supported SDK, see the Microsoft Learn prompt-agent quickstart.
Work with local prompts
Use a locally stored prompt when you want to work with a model from another provider or test local tools. Create the prompt in Agent Builder, select a model, enter its instructions, and select Save to Local. With a Foundry model, use the save menu to select local storage when that option is available.
Local prompts use Save to Local to save changes and create local versions. They do not create Foundry agent versions or Foundry conversation-history records.
Connect local MCP tools and mock functions
For a local prompt, use Tool > + > MCP Server to select an MCP server and its tools. Use Tool Catalog for server configuration and runtime prerequisites.
To test a function schema without implementing the service:
- In Tool, select + > Custom Tool.
- Choose By Example or Upload Existing Schema.
- Provide the function schema, name, and description, then add the tool.
- Enter a mock response in the tool card.
- Run the prompt and inspect how the model uses the response.
A mock response tests the model's use of a function. It does not call your external API. A configured MCP server, by contrast, can execute its tools.
Configure structured output
For a local prompt with a model that supports structured output:
- Open Settings next to the model selector.
- Under Structure Output, select
json_schema. - In Select JSON Schema, choose Use Example or Upload File.
- Review the schema and select Select.
- Save the local prompt and run a request to inspect its output.
The available response formats depend on the model. These instructions apply to local prompt execution. Do not use them to configure the response schema of a Foundry prompt agent.
Evaluate local prompts with dataset variables
For a saved local prompt, the Evaluation tab provides a dataset-based evaluation view. Use variables to run the same instructions against different dataset values.
For example, the instruction Summarize the issue for . uses a dataset column named audience. Supply a value in that column for each test case. The local batch runner substitutes the value when it runs the prompt.
Use the dataset to supply variable values. There is no separate Variables panel in the current Agent Builder playground. For importing data, running evaluators, and comparing results, see Evaluate models, prompts, and agents.
Generate code for a local prompt
Select View Code to generate model integration code. Available SDK, authentication, and language choices depend on the selected provider and model. This differs from the Foundry agent project and snippet options described above.